iHRM人力资源 - 处理token失效、退出登录、修改密码
文章目录
- iHRM人力资源 - 处理token失效、退出登录、修改密码
- 一、退出登录
- 1.1 处理token失效
- 1.2 调整下拉菜单
- 1.3 退出登录
- 二、修改密码
- 2.1 弹出层dialog
- 2.2 表单结构
- 2.3 表单校验
- 2.4 表单提交
- 三、路由
- 3.1 清理多余组件和路由
- 3.2 创建路由与页面
- 3.3 批量创建路由和组件
- 四、解析左侧菜单渲染
- 五、显示项目logo
一、退出登录
1.1 处理token失效
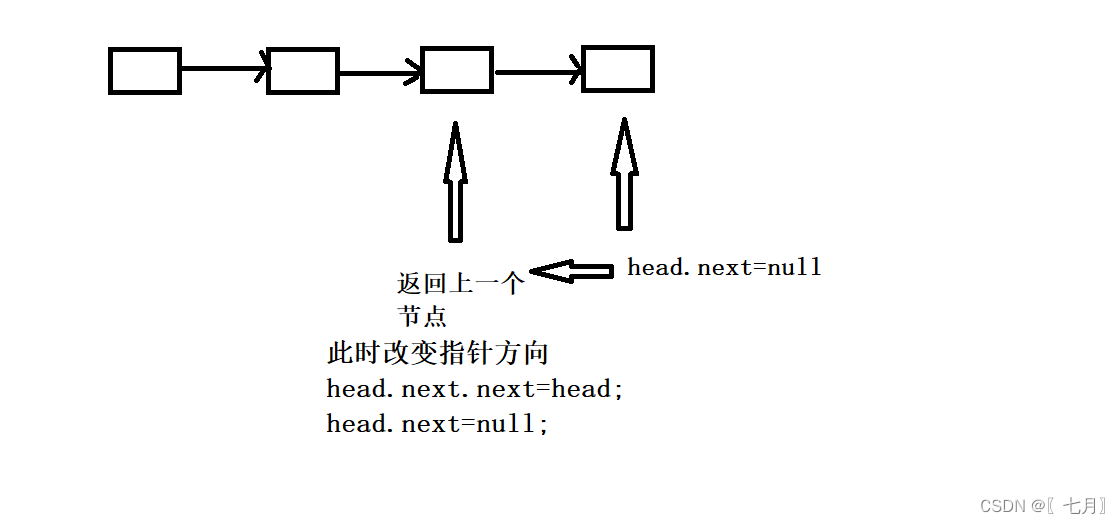
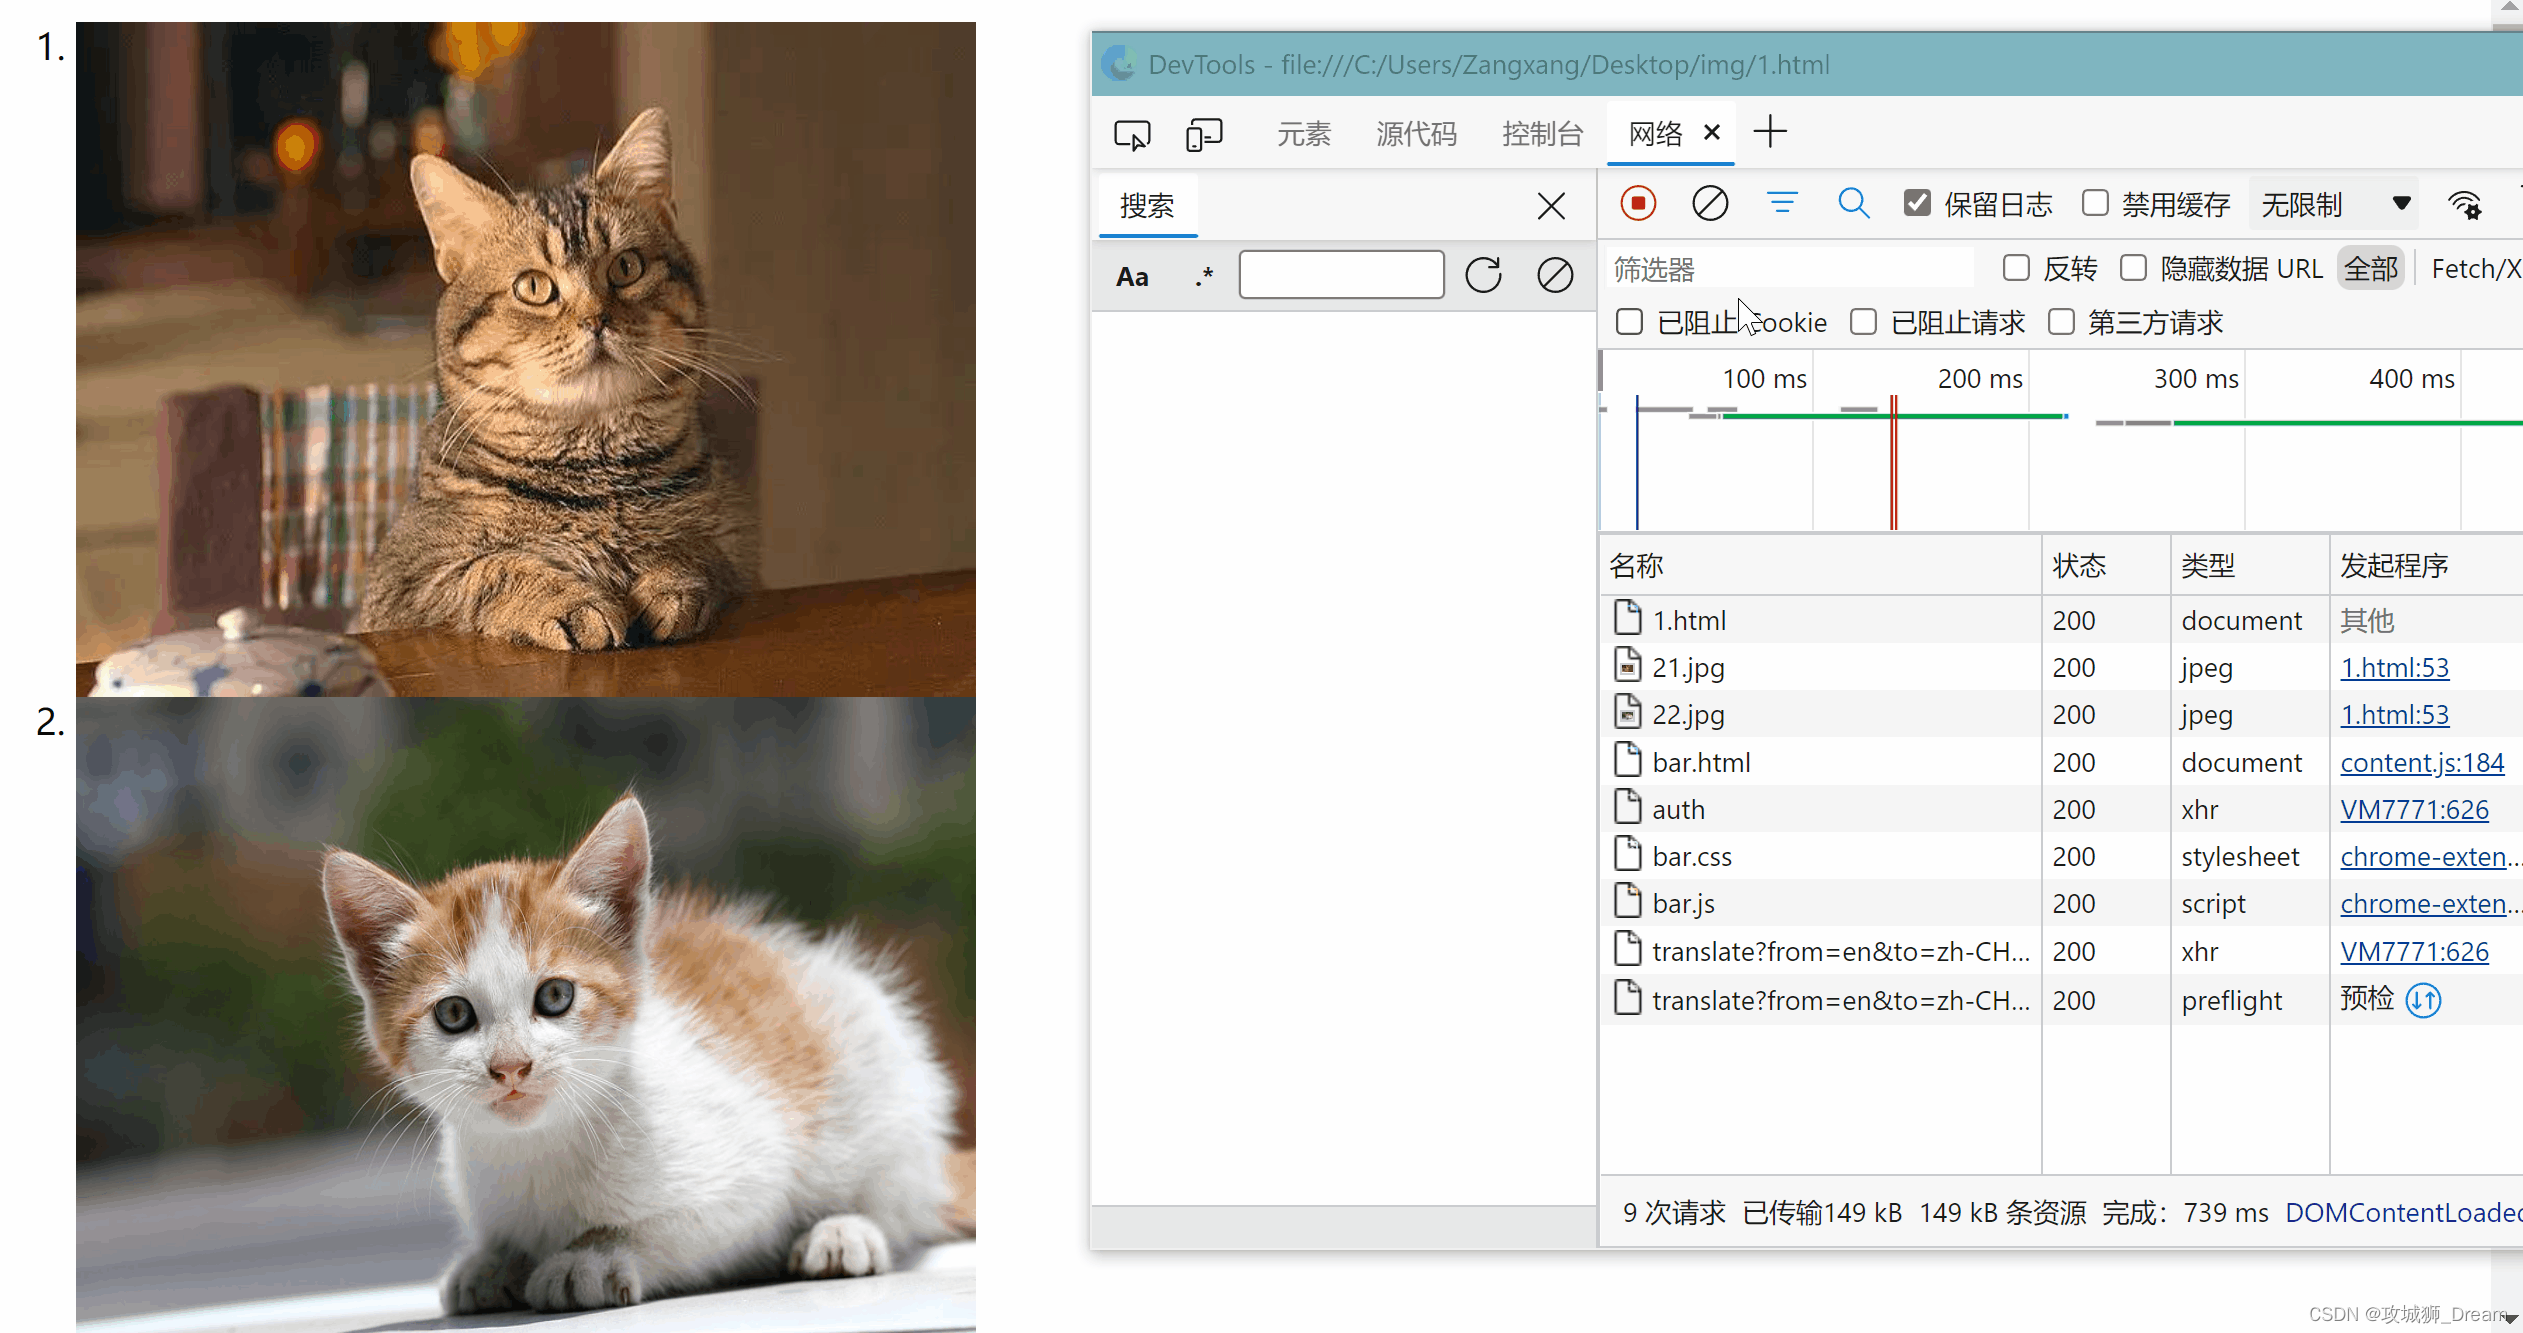
流程图如下所示

拦截器在如下所示的位置
// 创建响应拦截器,并且两个参数都是回调函数
service.interceptors.response.use(
  // 请求成功时响应,此时的响应默认包裹了一层data,即response.data才是后台服务返回的内容
  (response) => {
    // 一次性解析出response.data中的三个属性
    const { data, message, success } = response.data
    if (success) {
      // 此时响应正常
      return data
    } else {
      Message({ type: 'error', message: message })
      return Promise.reject(new Error(message))
    }
  },
  // 请求失败时响应
  async(error) => {
    if (error.response.status === 401) {
      Message({ type: 'warning', message: 'token 超时了,请重新登录' })
      // token超时,调用action退出登录
      // dispatch返回的是一个promise,这里会等dispatch执行完再执行路由跳转
      await store.dispatch('user/logout')
      // 主动跳转到登录页
      router.push('/login')
      return Promise.reject(error)
    }
    // this.$message.warning 不能这么使用,因为此时的this不是组件实例对象
    Message({ type: 'error', message: error.message })
    // 默认支持promise的,下面语句相当于终止了当前promise的执行
    return Promise.reject(error)
  }
)
async…await:
我们store.dispatch(‘user/logout’)中的dispatch其实是一个Promise,这里加一个“async…await”是为了将用户的信息全部删除完成后再跳转到登录页router.push(‘/login’)
加上“async…await”后,就会强制等待把用户信息、token全部删除干净了再跳转到登录页
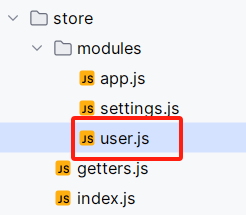
拦截器中需要调用vuex内容
// Mutations类似java中的数据层,只对数据进行操作,不对业务操作(比如数据加减乘除)
const mutations = {
  // 从浏览器缓存删除token
  removeToken(state) {
    // 删除vuex的token
    state.token = null
    // 删除缓存中的token
    removeToken()
  },
  setUserInfo(state, userInfo) {
    state.userInfo = userInfo
  }
    ..........
}


/**
 * actions似java中的业务逻辑层,对逻辑操作,然后向mutations发送数据,在这个业务逻辑中也可以互相调用
 * actions可以做异步操作
 */
const actions = {
  // 退出登录的action
  logout(context) {
    // 删除用户token
    context.commit('removeToken')
    // 删除用户信息(设置用户信息为空对象)
    context.commit('setUserInfo', {})
  },
    ...................
}
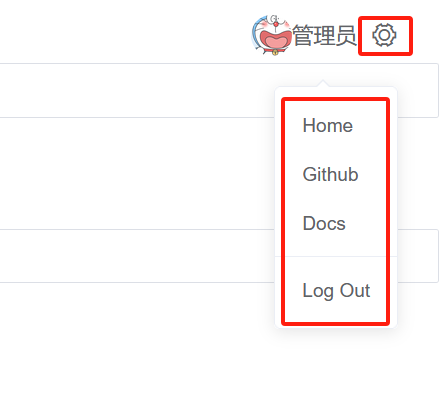
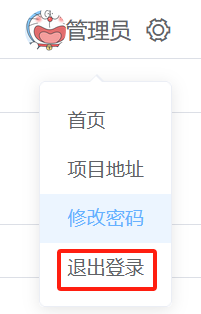
1.2 调整下拉菜单
我们现在菜单的内容是英文的形式,现在调整成中文的形式
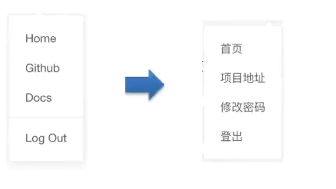
其实就是页面这部分的内容:
代码中的位置如下图所示:

代码如下图所示:
<template>
  <div class="navbar">
    <hamburger :is-active="sidebar.opened" class="hamburger-container" @toggleClick="toggleSideBar"/>

    <breadcrumb class="breadcrumb-container"/>

    <div class="right-menu">
      <el-dropdown class="avatar-container" trigger="click">
        <div class="avatar-wrapper">
          <!--用户头像,v-if判断用户头像是否存在-->
          <img v-if="avatar" :src="avatar" class="user-avatar">
          <!--如果用户头像不存在的时候执行下面的v-else,显示用户名的第一个字-->
          <!--当name时null或者undefined时name.charAt(0)会报错,但是当在name之后加上“?”后,如果name为null或者undefined,就不会执行charAt(0),也不会报错了-->
          <!-- "name?" 可选操作符,表示验证name是否一定有值。 此语法需要vue2.7.0之后的版本-->
          <span v-else class="username">{{ name?.charAt(0) }}</span>
          <!--用户名称-->
          <span class="name">{{ name }}</span>
          <!--图标(设置图标,是一个齿轮的样式)-->
          <i class="el-icon-setting"/>
        </div>
        <el-dropdown-menu slot="dropdown" class="user-dropdown">
          <router-link to="/">
            <el-dropdown-item>
              <!--Home-->
              首页
            </el-dropdown-item>
          </router-link>
          <a target="_blank" href="https://github.com/PanJiaChen/vue-admin-template/">
            <el-dropdown-item>
              <!--Github-->
              项目地址
            </el-dropdown-item>
          </a>
          <a target="_blank" href="https://panjiachen.github.io/vue-element-admin-site/#/">
            <el-dropdown-item>
              <!--Docs-->
              修改密码
            </el-dropdown-item>
          </a>
          <!--divided 属性是在列的上面有个分割线,我们去掉-->
          <!--<el-dropdown-item divided @click.native="logout">-->
          <el-dropdown-item @click.native="logout">
            <span style="display:block;">
             <!--Log Out-->
              退出登录
            </span>
          </el-dropdown-item>
        </el-dropdown-menu>
      </el-dropdown>
    </div>
  </div>
</template>
1.3 退出登录
实现退出登录功能

我们之前在处理token失效的时候写过退出的Action,我们直接调用就好了,调用完Action,直接将页面跳转到登录页面
<el-dropdown-item @click.native="logout">
  <span style="display:block;">
   <!--Log Out-->
    退出登录
  </span>
</el-dropdown-item>
native:事件的修饰符,此时是修饰@click点击事件,目的是注册组件的根元素的原生事件(也就是H5事件)
因为el-dropdown-item的标签并不是H5的标签,@click.native表示el-dropdown-item标签最终形成的H5的标签去注册H5标签的点击事件
如果不写“.native”表示注册的这个组件的自定义事件,而这个组件本身并没有click这个自定义事件,所以我们需要native触发click点击事件
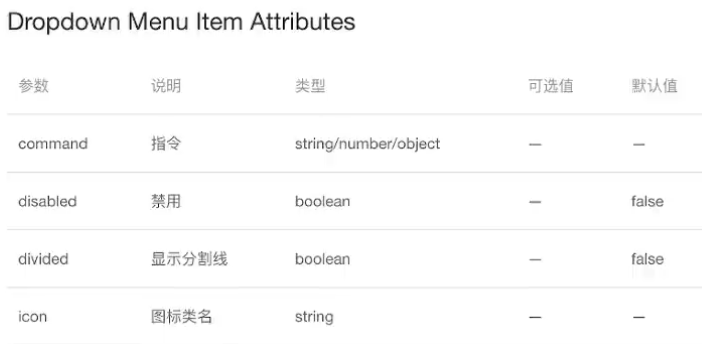
对于某个标签有没有点击事件,el开头的标签我们开element-ui文档即可,通过下面的文档发现,el-dropdown-item并没有点击事件
  methods: {
    async logout() {
      // 清除用户信息
      await this.$store.dispatch('user/logout')
      // await表示等待上面的代码执行完毕后,执行下面的代码,跳转页面到登录界面
      this.$router.push('/login')
    }
  }
点击“退出登录”后,其实就跳转到了http://localhost:9528/#/login页面
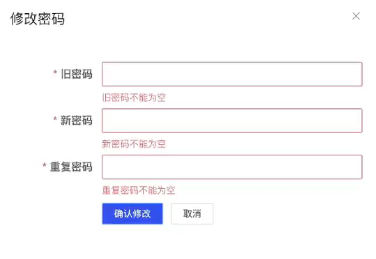
二、修改密码
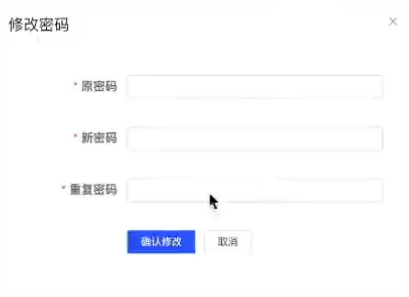
实现下面的一个效果
说明:超级管理员的密码不可修改,修改密码的时候要有校验功能
修改密码的整体流程

依然是下面这个位置
2.1 弹出层dialog
解释修饰符sync
可以接收子组件传过来的事件和值
我们点击弹出层dialog的“×”号后,所以“showDialog”接收到了el-dialog传过来的false值
这些事情是在el-dialog源码中写的
<template>
  <div>
    <!--放置dialog-->
    <!--title是dialog的标题; :visible.sync用来控制是否显示弹出层 sync作用是点击“×”号时能把弹出层关闭掉-->
    <el-dialog title="修改密码" :visible.sync="showDialog" width="450px">
      <!--放置dialog表单-->
    </el-dialog>
  </div>
</template>
data() {
  return {
    // 控制弹层的显示和隐藏
    showDialog: false
  }
},
  methods: {
    updatePassword() {
      // 弹出层显示
      this.showDialog = true
    }
}
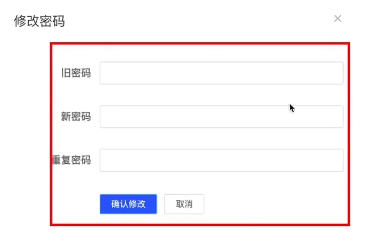
2.2 表单结构
如下图所示的结构
<!--放置dialog-->
<!--title是dialog的标题; :visible.sync用来控制是否显示弹出层 sync作用是点击“×”号时能把弹出层关闭掉-->
<el-dialog title="修改密码" :visible.sync="showDialog" width="450px">
  <!--放置dialog表单-->
  <!--设置完成label-width="120px"后,提示信息就和输入框在同一行了-->
  <el-form label-width="120px">
    <!--label属性其实就是此item的提示信息-->
    <el-form-item label="旧密码">
      <el-input show-password size="small"></el-input>
    </el-form-item>
    <!--show-password 属性表示输入的内容是密文-->
    <el-form-item label="新密码">
      <el-input show-password size="small"></el-input>
    </el-form-item>
    <el-form-item label="重复密码">
      <el-input show-password size="small"></el-input>
    </el-form-item>
    <!--按钮-->
    <el-form-item>
      <el-button size="mini" type="primary">确认修改</el-button>
      <el-button size="mini">取消修改</el-button>
    </el-form-item>
  </el-form>
</el-dialog>
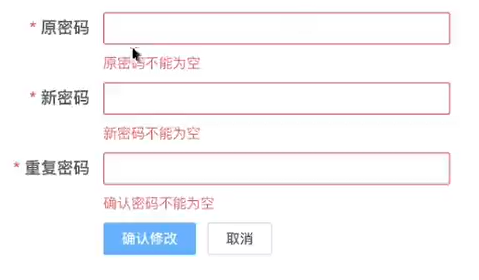
2.3 表单校验
其实就是实现下图所示的功能
<!--放置dialog-->
<!--title是dialog的标题; :visible.sync用来控制是否显示弹出层 sync作用是点击“×”号时能把弹出层关闭掉-->
<el-dialog title="修改密码" :visible.sync="showDialog" width="450px">
  <!--放置dialog表单-->
  <!--设置完成label-width="120px"后,提示信息就和输入框在同一行了-->
  <!--ref属性是为了获取整个表单的属性-->
  <el-form label-width="120px" :model="passForm" :rules="rules" ref="passForm">
    <!--label属性其实就是此item的提示信息-->
    <el-form-item label="旧密码" prop="oldPassword">
      <el-input show-password v-model="passForm.oldPassword" size="small"></el-input>
    </el-form-item>
    <!--show-password 属性表示输入的内容是密文-->
    <el-form-item label="新密码" prop="newPassword">
      <el-input show-password v-model="passForm.newPassword" size="small"></el-input>
    </el-form-item>
    <el-form-item label="重复密码" prop="confirmPassword">
      <el-input show-password size="small" v-model="passForm.confirmPassword"></el-input>
    </el-form-item>
    <!--按钮-->
    <el-form-item>
      <el-button size="mini" type="primary">确认修改</el-button>
      <el-button size="mini">取消修改</el-button>
    </el-form-item>
  </el-form>
</el-dialog>
data() {
  return {
    // 控制弹层的显示和隐藏
    showDialog: false,
    // 修改密码功能表单内容
    passForm: {
      // 旧密码
      oldPassword: '',
      // 新密码
      newPassword: '',
      // 确认密码
      confirmPassword: ''
    },
    // 修改密码功能的表单校验内容
    rules: {
      // 旧密码
      oldPassword: [
        // trigger: 'blur' 表示失去焦点的时候再触发校验功能
        { required: true, message: '旧密码不能为空', trigger: 'blur' },
        {}
      ],
      // 新密码
      newPassword: [
        { required: true, message: '新密码不能为空', trigger: 'blur' },
        { min: 6, max: 16, message: '新密码长度6-16', trigger: 'blur' }
      ],
      // 确认密码
      confirmPassword: [
        { required: true, message: '重复密码不能为空', trigger: 'blur' },
        // 当满足第一个required: true触发规则后,才会触发下面的这个规则
        // 自定义校验规则validator,参数1:rule规则,参数2:value参数值,也是就是重复密码的值参数3:callback必须执行的回调函数
        {
          trigger: 'blur', validator: (rule, value, callback) => {
            // 只有当此方法是牵头函数的时候,此处的this才指代组件实例对象
            if (this.passForm.newPassword === value) {
              // 用户输入的新密码和重复密码是相等的,我们执行一下callback回调函数
              callback()
            } else {
              // 否则就放入一个错误对象
              callback(new Error('重复密码和新密码输入不一致'))
            }
          }
        }
      ]
    }
  }
}
2.4 表单提交

如果调用接口失败的话,我们可以不用处理,我们在拦截器中配置了失败时候的提示信息

接口可以写在下面这个问题里

<!--按钮-->
<el-form-item>
  <el-button @click="btnOK" size="mini" type="primary">确认修改</el-button>
  <el-button @click="btnCancel" size="mini">取消修改</el-button>
</el-form-item>
btnOK() {
  this.$refs.passForm.validate(async isOK => {
    if (isOK) {
      // 表示校验通过,下一步调用接口
      await updatePassword(this.passForm)
      // 只要执行到这里,说明一定是执行成功
      this.$message.success('修改密码成功')
      this.btnCancel()
      // // 关闭Dialog
      // this.showDialog = false
      // // 重置表单
      // this.$refs.passForm.resetFields()
    }
  })
},
btnCancel() {
  // 关闭Dialog
  this.showDialog = false
  // 重置表单
  this.$refs.passForm.resetFields()
}
api请求内容
// 更改用户密码
export function updatePassword(data) {
  return request({
    url: '/sys/user/updatePass',
    method: 'PUT',
    // 下面这行参数可以简写成 data
    data: data
  })
}
修改下面的bug
当我们点击右上角的叉号后,再打开此页面,会出现下面这个情况,还会有表单验证的提示
按理说我们这是重新打开的表单,不能用表单验证提示,所以改一下
其实就是加了一个@close属性
<!--放置dialog-->
<!--title是dialog的标题; :visible.sync用来控制是否显示弹出层 sync作用是点击“×”号时能把弹出层关闭掉-->
<!--除此之外我们还要添加@close="btnCancel,因为我们只添加sync,当关闭dialog再打开后,表单验证的内容还会存在,所以再加一个@close,当dialog关闭后会执行@close-->
<el-dialog title="修改密码" @close="btnCancel" :visible.sync="showDialog" width="450px">
</el-dialog>
三、路由
3.1 清理多余组件和路由
- 我们现在只保留登录页面、主页、404页面,其他的全部删除
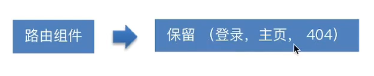
下面选中的全部删除

- 删除页面后,我们对应的路由配置也要删除

import Vue from 'vue'
import Router from 'vue-router'

Vue.use(Router)

/**
 *  Layout @/在vue中代表路径别名
 *  @ 符号表示当前目录的src
 *  @/ 表示src下的layout,而layout又是一个目录,所以会拉取index.vue文件
 *  即index.vue组件就是我们的路由组件,会实现二级路由
 * */
import Layout from '@/layout'

export const constantRoutes = [
  {
    path: '/login',
    component: () => import('@/views/login/index'),
    hidden: true
  },

  {
    path: '/404',
    component: () => import('@/views/404'),
    hidden: true
  },

  {
    path: '/',
    component: Layout,
    redirect: '/dashboard',
    children: [{
      path: 'dashboard',
      name: 'Dashboard',
      component: () => import('@/views/dashboard/index'),
      meta: { title: 'Dashboard', icon: 'dashboard' }
    }]
  },

  // 404 page must be placed at the end !!!
  // 下面这行路由是兜底的方案,如果找不到页面,就会匹配最后的*,然后跳转到404页面
  { path: '*', redirect: '/404', hidden: true }
]

const createRouter = () => new Router({
  // mode: 'history', // require service support
  scrollBehavior: () => ({ y: 0 }),
  routes: constantRoutes
})

const router = createRouter()

// Detail see: https://github.com/vuejs/vue-router/issues/1234#issuecomment-357941465
export function resetRouter() {
  const newRouter = createRouter()
  router.matcher = newRouter.matcher // reset router
}

export default router
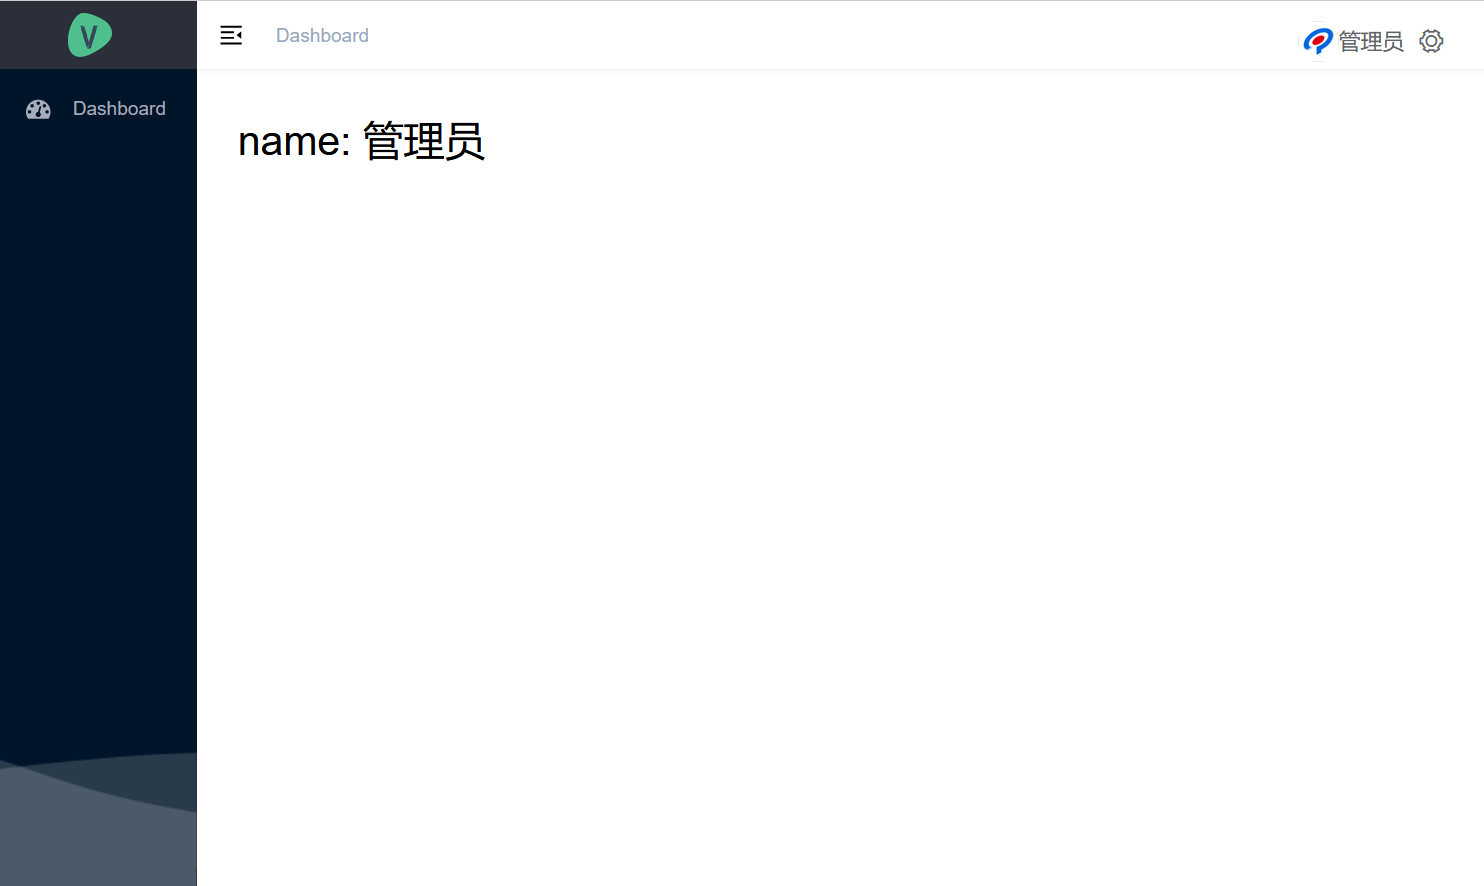
目前的首页内容如下图所示
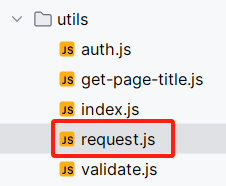
- 请求模块多余的内容也删除

选中的内容删除

3.2 创建路由与页面
人力资源项目的业务模块如下图所示
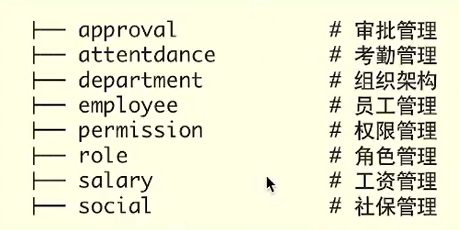
建立对应的路由组件-路由配置

其实相当于把上面的八个功能都模块化了,组件模块化、路由模块化
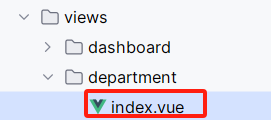
创建department组织架构模块
创建department的路由信息

// 这个相当于一级路由
import layout from '@/layout/index.vue'

// 默认导出
export default {
  // 路由信息
  path: '/department',
  // 一级路由
  component: layout,
  // 二级路由
  children: [
    {
      // 二级路由path为空,表示'/department'路径时显示一级路由+二级路由
      // 并且按需导入department文件下的组件
      path: '',
      component: () => import('@/views/department'),
      // name属性在这里可以用来跳转,也可以用来标记路由
      // 为什么要标记路由?因为我们后面要做权限的控制,对权限做细分化,
      name: 'department',
      // 路由的元信息,其实就是用来存储数据的,比如说图标信息
      // 在我们的基础模板里面读取了meta的icon和title,并显示在了页面左侧菜单上
      meta: {
        icon: 'tree', // 菜单的图标
        title: '组织' // 菜单的标题
      }
    }
  ]
}
在总路由配置中引用department路由
import Vue from 'vue'
import Router from 'vue-router'

Vue.use(Router)

/**
 *  Layout @/在vue中代表路径别名
 *  @ 符号表示当前目录的src
 *  @/ 表示src下的layout,而layout又是一个目录,所以会拉取index.vue文件
 *  即index.vue组件就是我们的路由组件,会实现二级路由
 * */
import Layout from '@/layout'
import departmentRouter from '@/router/modules/department'

export const constantRoutes = [
  {
    path: '/login',
    component: () => import('@/views/login/index'),
    hidden: true
  },

  {
    path: '/404',
    component: () => import('@/views/404'),
    hidden: true
  },

  {
    path: '/',
    component: Layout,
    redirect: '/dashboard',
    children: [{
      path: 'dashboard',
      name: 'Dashboard',
      component: () => import('@/views/dashboard/index'),
      meta: { title: 'Dashboard', icon: 'dashboard' }
    }]
  },
  departmentRouter,

  // 404 page must be placed at the end !!!
  // 下面这行路由是兜底的方案,如果找不到页面,就会匹配最后的*,然后跳转到404页面
  { path: '*', redirect: '/404', hidden: true }
]

const createRouter = () => new Router({
  // mode: 'history', // require service support
  scrollBehavior: () => ({ y: 0 }),
  routes: constantRoutes
})

const router = createRouter()

// Detail see: https://github.com/vuejs/vue-router/issues/1234#issuecomment-357941465
export function resetRouter() {
  const newRouter = createRouter()
  router.matcher = newRouter.matcher // reset router
}

export default router
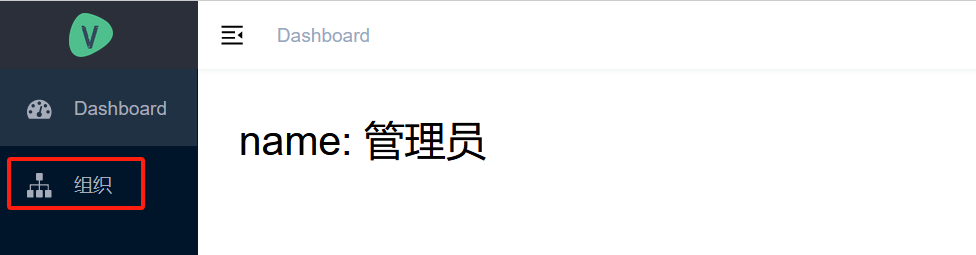
主页面内容
3.3 批量创建路由和组件
总路由配置
import Vue from 'vue'
import Router from 'vue-router'

Vue.use(Router)

/**
 *  Layout @/在vue中代表路径别名
 *  @ 符号表示当前目录的src
 *  @/ 表示src下的layout,而layout又是一个目录,所以会拉取index.vue文件
 *  即index.vue组件就是我们的路由组件,会实现二级路由
 * */
import Layout from '@/layout'
import departmentRouter from '@/router/modules/department'
import approvalRouter from '@/router/modules/approval'
import attendanceRouter from '@/router/modules/attendance'
import employeeRouter from '@/router/modules/employee'
import permissionRouter from '@/router/modules/permission'
import roleRouter from '@/router/modules/role'
import salaryRouter from '@/router/modules/salary'
import socialRouter from '@/router/modules/social'

export const constantRoutes = [
  {
    path: '/login',
    component: () => import('@/views/login/index'),
    hidden: true
  },

  {
    path: '/404',
    component: () => import('@/views/404'),
    hidden: true
  },

  {
    path: '/',
    component: Layout,
    redirect: '/dashboard',
    children: [{
      path: 'dashboard',
      name: 'Dashboard',
      component: () => import('@/views/dashboard/index'),
      meta: { title: '首页', icon: 'dashboard' }
    }]
  },
  departmentRouter,
  roleRouter,
  employeeRouter,
  permissionRouter,
  attendanceRouter,
  approvalRouter,
  salaryRouter,
  socialRouter,
  // 404 page must be placed at the end !!!
  // 下面这行路由是兜底的方案,如果找不到页面,就会匹配最后的*,然后跳转到404页面
  { path: '*', redirect: '/404', hidden: true }
]

const createRouter = () => new Router({
  // mode: 'history', // require service support
  scrollBehavior: () => ({ y: 0 }),
  routes: constantRoutes
})

const router = createRouter()

// Detail see: https://github.com/vuejs/vue-router/issues/1234#issuecomment-357941465
export function resetRouter() {
  const newRouter = createRouter()
  router.matcher = newRouter.matcher // reset router
}

export default router
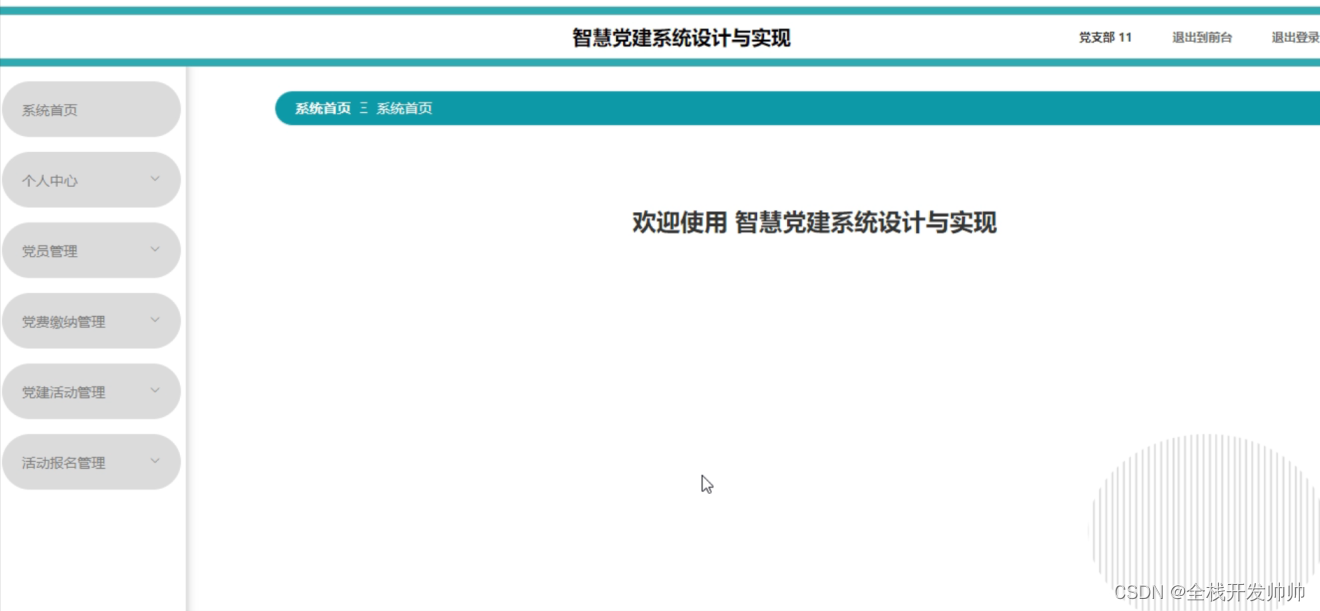
页面展示
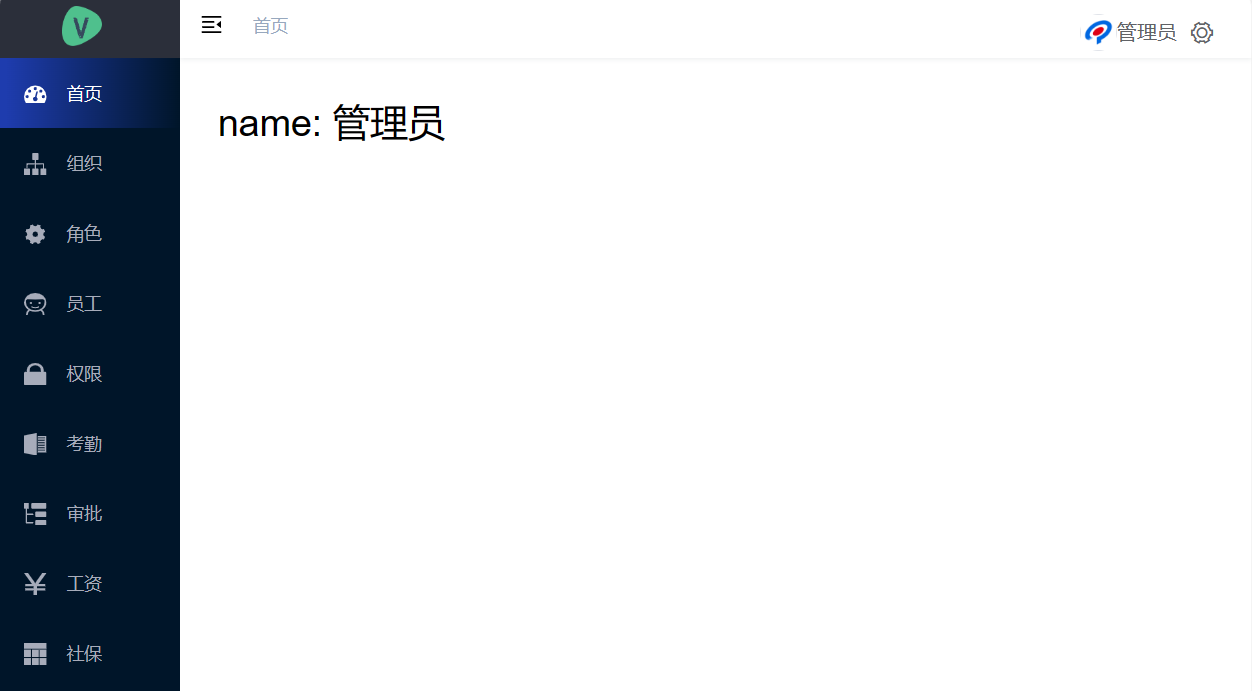
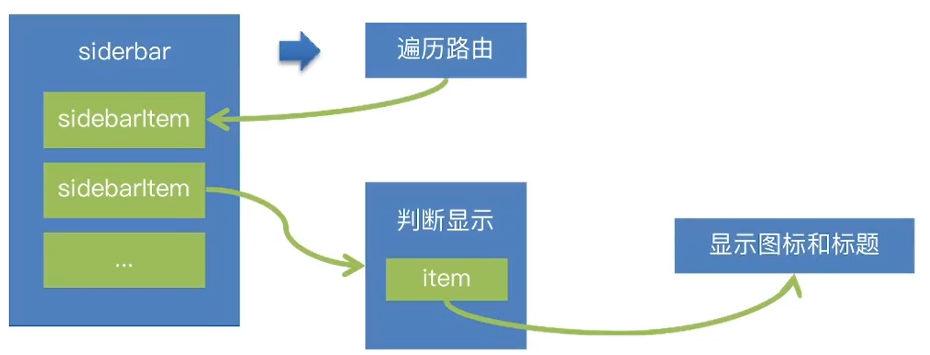
四、解析左侧菜单渲染
我们上面通过建立路由生成了左侧的菜单,那到底是怎么实现的?
我们的左侧菜单栏是一个叫“sidebar”的菜单组件,会根据路由组件渲染出左侧的菜单内容

siderbar组件会读取路由信息并且会遍历,然后生成一个叫做siderbarItem的组件且会生成很多个(有多少个路由就会生成多少个)
并不是有多少个siderbarItem就会显示多少个左侧菜单,我们会针对siderbarItem组件进行条件渲染,来判断会不会显示
比如登录、404页面就没有在侧边栏展示
如果确定某个组件显示,我们就又会用上一个组件叫做Item组件,此Item组件会渲染咱们传进去的标题和图标,也是就一个渲染过程
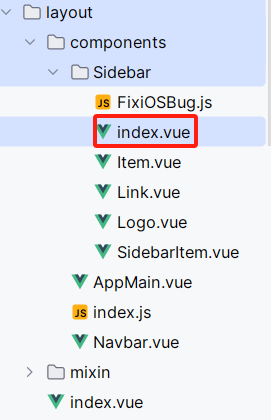
我们查看一下这个组件的代码
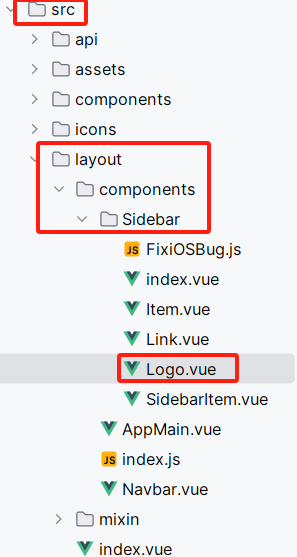
五、显示项目logo
在settings.js文件中会有许多的配置选项,其中sidebarLogo属性表示是否显示logo标志
module.exports = {

  title: '人力资源后台管理系统',

  /**
   * @type {boolean} true | false
   * @description Whether fix the header
   */
  fixedHeader: false,

  /**
   * @type {boolean} true | false
   * @description Whether show the logo in sidebar
   */
  sidebarLogo: true
}

当设置为true后,我们这里就会有一个图标

但是这个图标并不是我们想要的,所以我们要去左侧菜单里那里进行修改
<template>
  <!--当菜单栏缩小的时候会有一个collapse,当这个类collapse存在,则就是在缩小的情况下-->
  <div class="sidebar-logo-container" :class="{'collapse':collapse}">
    <transition name="sidebarLogoFade">
      <router-link key="collapse" class="sidebar-logo-link" to="/">
        <img src="@/assets/common/logo.png" class="sidebar-logo">
      </router-link>
    </transition>
  </div>
</template>

<script>
export default {
  name: 'SidebarLogo',
  props: {
    collapse: {
      type: Boolean,
      required: true
    }
  },
  data() {
    return {
      title: 'Vue Admin Template',
      logo: 'https://wpimg.wallstcn.com/69a1c46c-eb1c-4b46-8bd4-e9e686ef5251.png'
    }
  }
}
</script>

<style lang="scss" scoped>
.sidebarLogoFade-enter-active {
  transition: opacity 1.5s;
}

.sidebarLogoFade-enter,
.sidebarLogoFade-leave-to {
  opacity: 0;
}

.sidebar-logo-container {
  position: relative;
  width: 100%;
  height: 50px;
  line-height: 50px;
  //background: #2b2f3a;
  text-align: center;
  overflow: hidden;

  & .sidebar-logo-link {
    height: 100%;
    width: 100%;

    & .sidebar-logo {
      width: 140px;
      //height: 32px; 高度自适应
      vertical-align: middle;
      margin-right: 12px;
    }

    & .sidebar-title {
      display: inline-block;
      margin: 0;
      color: #fff;
      font-weight: 600;
      line-height: 50px;
      font-size: 14px;
      font-family: Avenir, Helvetica Neue, Arial, Helvetica, sans-serif;
      vertical-align: middle;
    }
  }

  &.collapse {
    .sidebar-logo {
      margin-right: 0px;
      width: 32px;
      height: 32px;
    }
  }
}
</style>
页面样式